CAGD 320 Midterm
Alchemist & Designer
In these set of assignments we were tasked with creating progressively more and more complex texture maps. There were several different tutorials showcasing how to achieve the textures that I created, examples of these that I will showcase include a brick, wood, metal, and mud texture as shown below.

The main issue I had with this assignment in my opinion would have to be trying to achieve the same detail as the tutorials. Here are links to the tutorials I used, beginning with the brick tutorial which took quite some time to create.
()
This next link is for the Wood planks
()
And for the rusted metal
()
Although all the tutorials taught me how to texture quite well it also showed me the differences between Alchemist and Designer. Although you can do almost everything from Alchemist in Designer, Designer had much more in depth detail when it came to texturing the materials.
They were very similar in that their UI was very easy to Navigate as well. Overall The assignment went quite well in the end with no major complications
Substance Painter Tutorials
In one of the Substance painter tutorials we were tasked with creating a lantern with varying degrees of wear and tear on it. This included a couple hours of adjustments in order to create a lamp with realistic rust and wear on it. The other part of the assignment was a bit more simple which was the speaker portion of the assignment; where we were tasked with texturing a model of a guitar amplifier in order to resemble a much more realistic look as shown below.

The main issue and only issue I had with this assignment was trying to follow the lantern tutorial as best as I could since there were many missing components such as the "MG" generators within the layer stack. For some reason the tutorial had them and my software was missing it. this eventually made my model look quite different than the one in the tutorial. However, I still adjusted it to my liking and made it look relatively realistic given the limited tools I was using in Painter.
Knife Retopology and Texturing
In this Assignment we were tasked with Converting a 3D Scanned high poly model(1,000,000+ Tris) of various knives into low poly models (2,000 Max Tris) using the quad draw tool in Maya. This technique allowed for us to render the knives into Unity's 3D Space with a fraction of the data that came with the 3D scanned high poly models. Below are all the knifes after low poly modeling and texturing using painter


Throughout this assignment I didn't really face any sort of issues until it came to exporting my textures to unity. For some reason although all my knives baked correctly in painter only 2 were shown to be baked correctly in unity as shown below.


Here are the texture maps used for one of my models, specifically the first knife I showcased above.


320 Final Micro Blacksmith Scene
Blog Post 1:
For my first part of this project I had blocked out the entire scene using primitive objects. This was perhaps the easiest part because all I had to decide on was the placement of the different objects I had chosen for my scene. Using a piece of concept reference art to guide my ideas I had chosen a scene that appears to be from the Elder Scrolls: Skyrim game as shown below.

Now taking a look at my scene and the placement I had decided was a bit different from this photo however I decided that it wouldn't necessarily be the final placement of my objects. I realized that once I put the objects in the scene might look quite different than how I imagined so I left my options open.


My next step is to decide in specific which assets I'm going to decided to use within my scene.
Blog post 2:
In this update I had decided the final list of assets that I decided to use in my scene. Here's a list of everything I decided to use:
- Furnace
- Forge
- Either one of the barrels circled below
- One of the weapon racks circled below
- Weapon sharpener
- Sword
- War hammer
- Pike
- Forging hammer
- Table
- Stool
- Wagon
- Wheelbarrow
- Anvil
- Fence posts
- Either Crates
- Large Shed
- Well


Blog post 3:
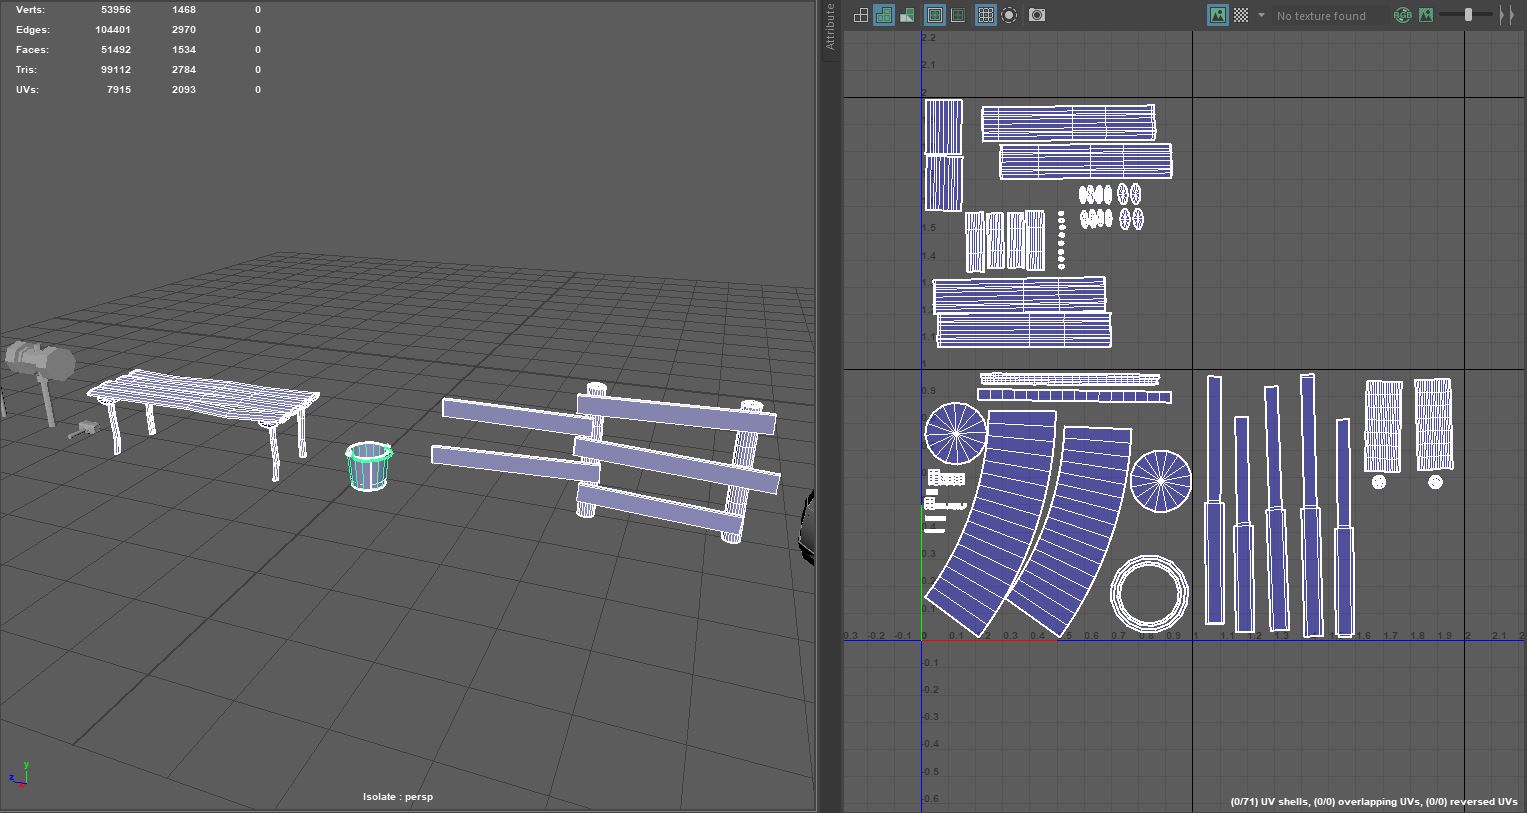
In this weeks update I have completed basically half of all my UV's. Starting mainly with the small to medium objects as shown below. Fortunately I didn't really encounter any major setbacks in this part of the assignment; however I did notice one thing about the blacksmith's hammer shown below.

It was nothing serious, however I realized that the hammer is already UV'd. I tried using the planar projection to create my own UV's from scratch however all the edges remained cut even after I used planar. So I just decided to lay it out to look more organized than what the layout option does.


Blog post 4:
In this week I actually focused more on making more seamless UVs among the models I already UV'd last week. It kind of set me back because this week because I only got a few more UV'd items. These were the Anvil, the box, and the log. I'm actually midway through the process of UVing my wagons and shed along with the Weapon rack however. Shown below are just a few of the UVs I had updated .


Below are the UVs of the new objects.


Overall I didn't really have many issues other than getting the UVs to appear seamless compared to before. My goal for the next week is to finish the rest of my UVs and begin texturing my objects before placing them within my scene so I should be on track once my UVs are complete.
Blog Post 5:
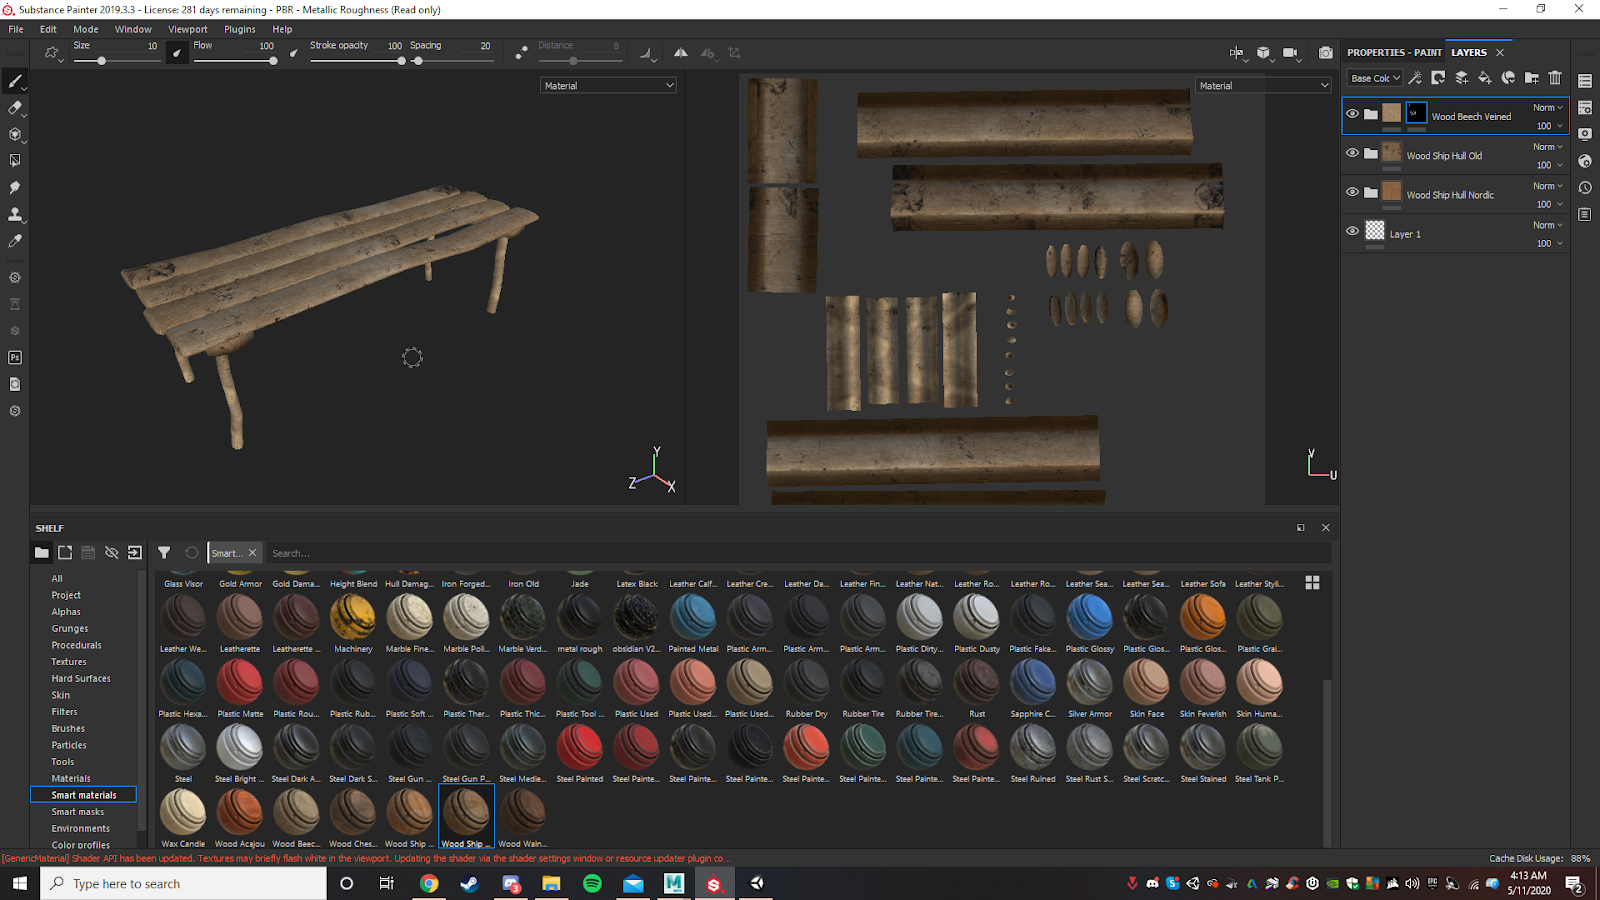
In my 5th week working on this project fortunately I barely ran into any issues when it came to texturing my objects. They were fairy simple to texture, for some I found them to look a lot better with just the one material given in painter, I used this for the objects such as the table, crates, and barrels. Others I decided to have a combination of different materials on the different parts of the object such as the blacksmith's hammer shown below. For example I used the leather material for the handle, the stone/ concrete material for the hammer itself, and gold accents. With all the materials I used, I tried my best to make them appear more original by tweaking the settings without altering the material too much.

In my opinion I thought the coolest looking material was the marble material which I had actually used for both my War-hammer and my furnace. Another Material that I had utilized from a previous assignment was the obsidian texture I used with my knife. I thought that would be an interesting touch to the handle of the hammer along with a leather wrap.

Overall however the texturing process was very smooth and didn't take too long, past combining textures to create new materials. The only big problem I had ran into was mainly my fault. Basically what I did was that I had saved all the textures under the default PBR workflow, rather than saving them out for Unity HDRP. The reason why this was a problem was 1 because the PBR workflow was missing the mask map used to create the completed material in unity; and 2 because after texturing each object I had decided not to save every project and moved onto the next object since I knew I wasn't turning the painter files in. I was under the impression I was fine with just the textures I exported. This led to me having to waste a lot of time re texturing every single object in my scene.
Blog Post 6:
For the final week of my project I had only a few things to do, plug in all the textures I had recently exported into my materials, import all the fbx files from Maya, and finally place them all in my scene. Soon after I had created my materials I realized that I wouldn't need to bring every single object from Maya individually, instead I imported the whole scene I had already laid out in Maya and brought everything into unity placed just the way I'd envisioned.

After this all I had to do was apply the materials (including the ground material from Alchemist), set up the HDRI sky and tweak with the fog and lighting settings in my scene to give it a much more immersive appearance. Shown below is the final product after I had tweaked with these settings.

You can see in the scene I had actually added a couple more objects, the Archway acting as an entrance, as well as the lanterns I realized I had forgotten earlier in the project, as well as giving them both 512 maps. The Lantern I had a bit of issues with transferring the glass material over to Unity, I eventually just textured it with a glass film though. Overall, other than that I had barely any issues in unity, This was actually the quickest part of the assignment for me since all I was really doing was adding the 3 lights coming from lanterns, plugging in all the assets, and assigning materials to them all. Shown below is a better view of the final product.


Comments
Post a Comment